Matcha the Little Snake Pattern
When I found out that 2025 is the Year of the Snake, my heart sunk a little . . . I have to admit, I’m scared of snakes, even crochet ones. But in honor of Lunar New Year, I figured I’d at least try and ended up creating a little snake that I absolutely adore! Meet “Matcha the Little Snake!”
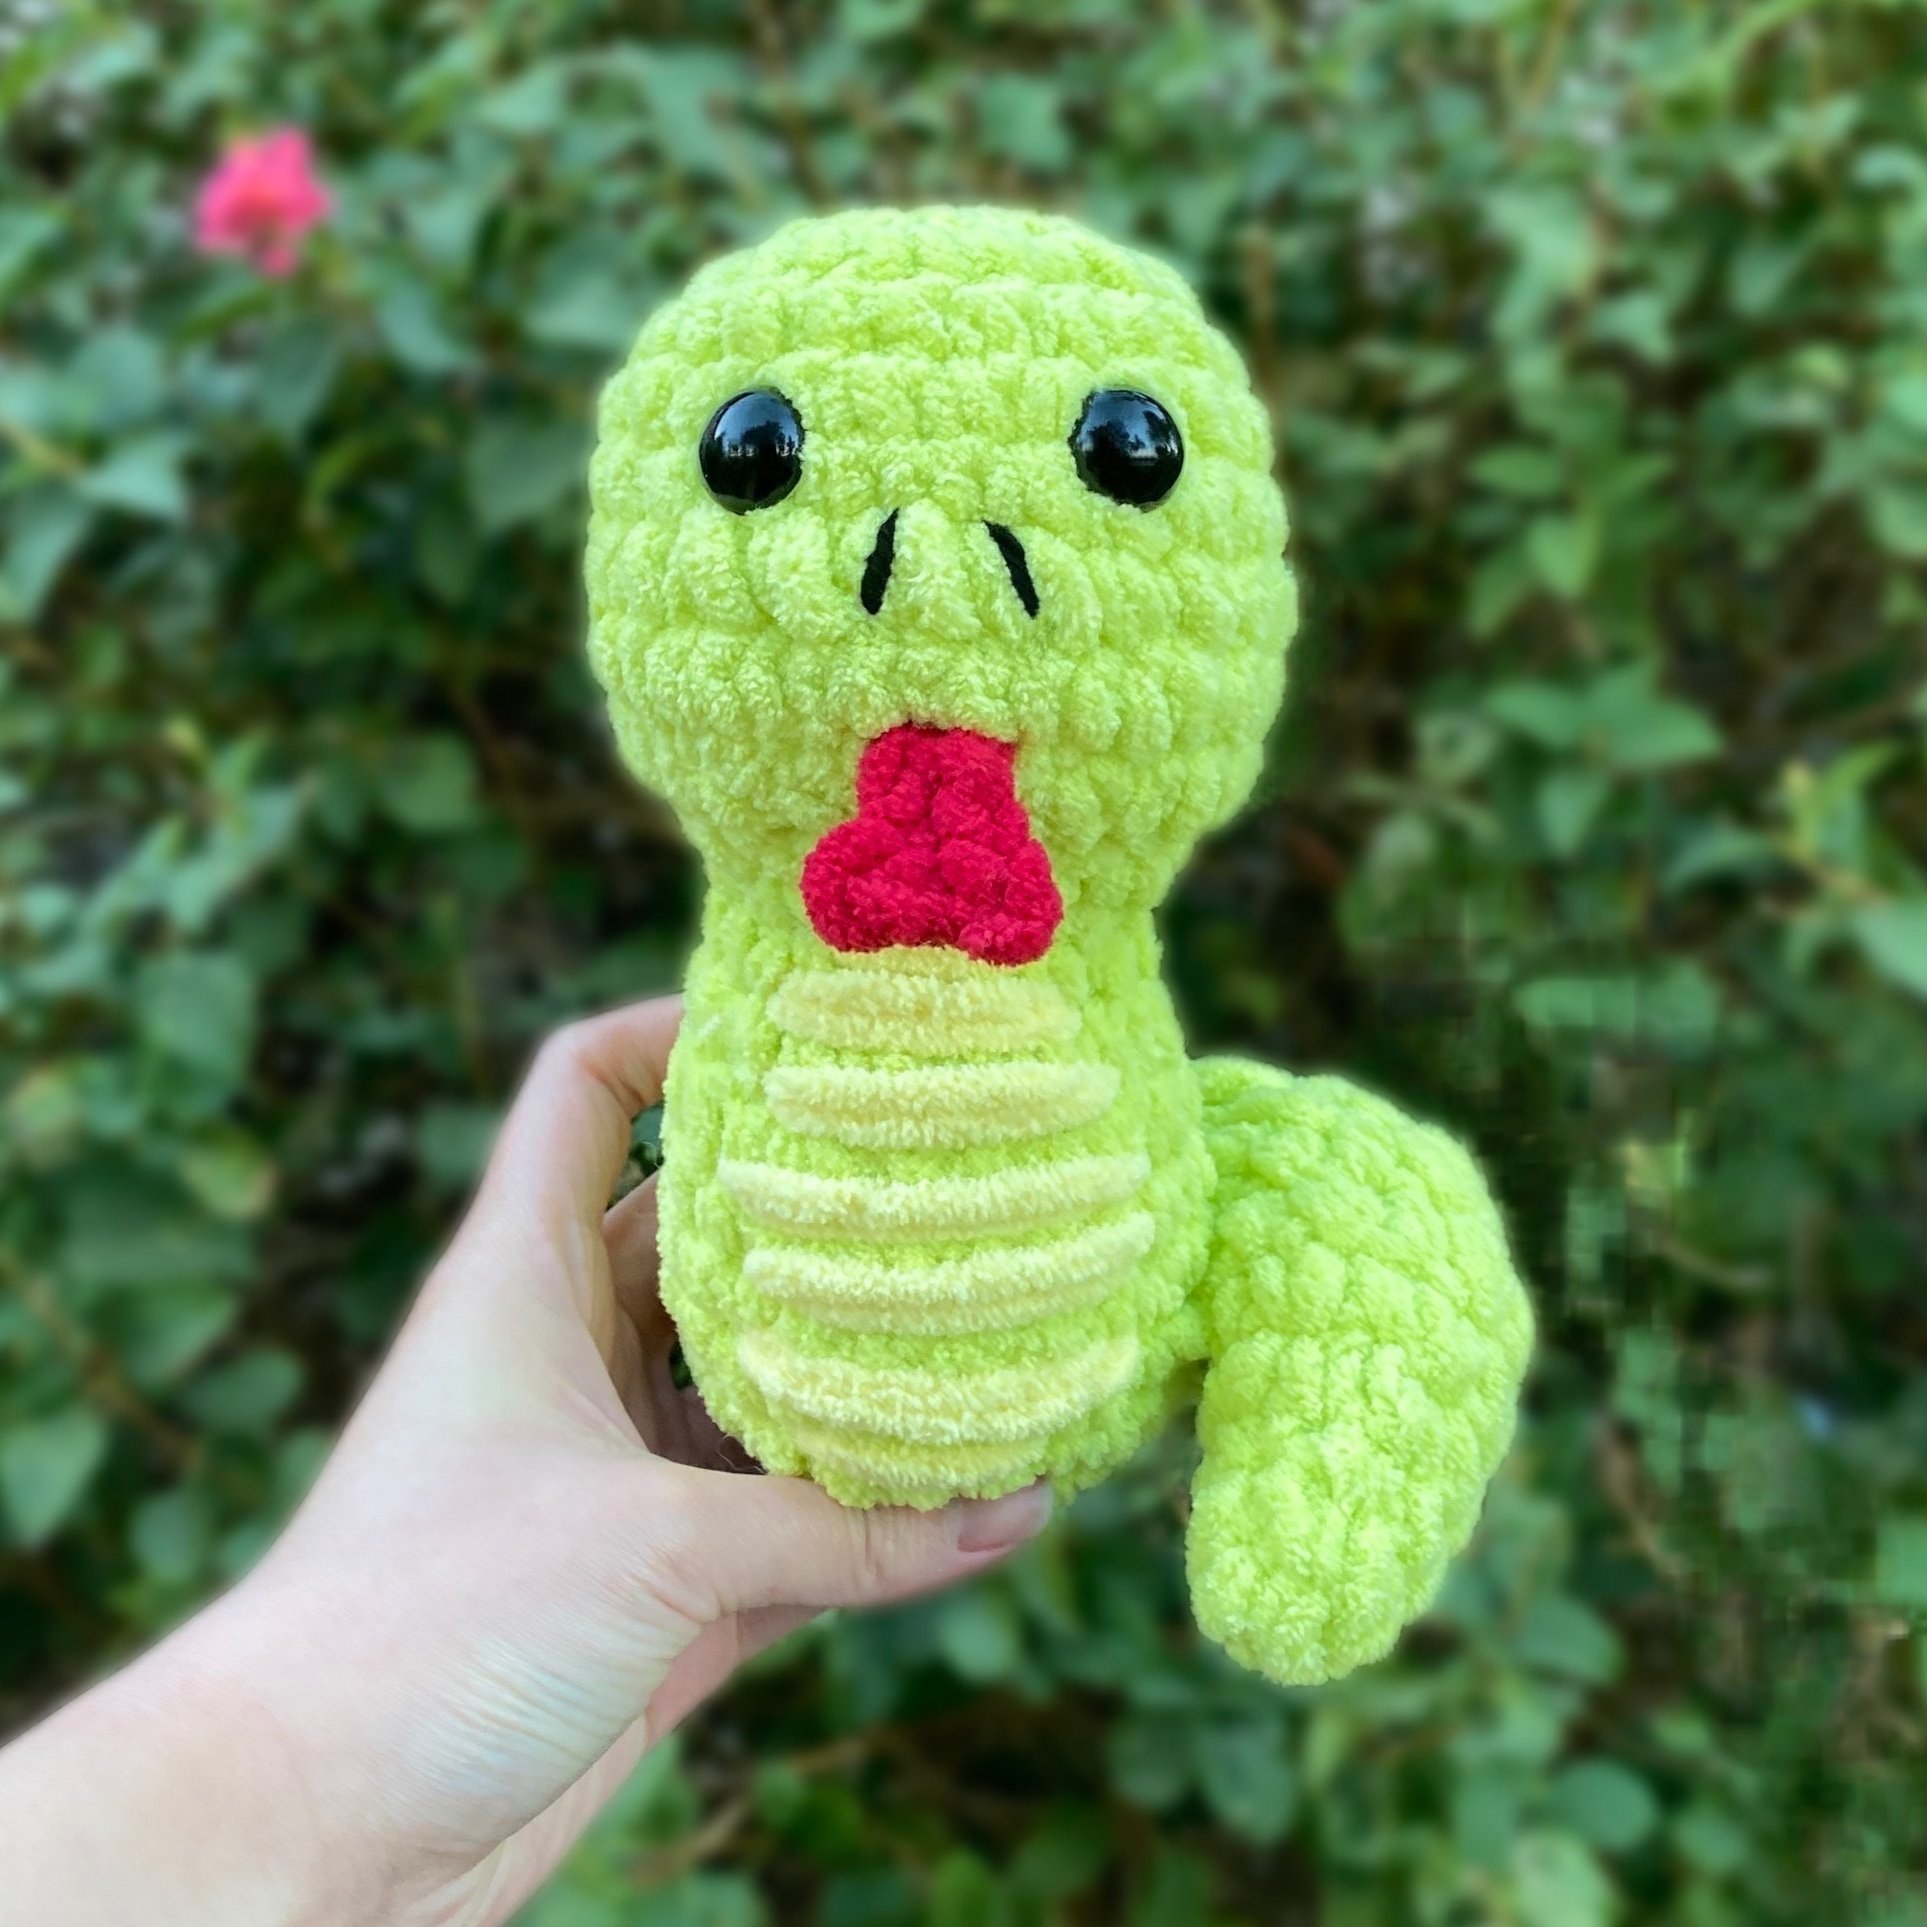
The inspiration of this snake was simply, “how do I make this less scary to me?” - which meant no curly long body and instead, more of a cartoon vibe.
Although at first, I was still a little squeamish when I finished him, he’s really grown on me! It’s safe to say, we’re now friends and I love him very much, so much so that I wanted to give him a name.
I asked for some suggestions on my video, but in the end, I decided to name him, “Matcha” for the most “not scary” green thing that I could think of! It also kind of matches the name of my 2023 Lunar New Year pattern: Bao the Bunny.
Just like “Bao the Bunny,” this tiny snake is a pretty simple project that can be made really quickly. It’s perfect if you’re looking for a cute, fast project, and also want to make something for the new year! Of course, you can also make this if you just want to make a cute, tiny snake or for another suitable occasion. I also think it’s a pretty beginner friendly piece and I even made a beginner tutorial for it.
If you want to make your own version of this “not-so-scary” snake, you can find the free pattern below. OR you can also find an ad-free PDF version with more pictures on my Patreon. You can also follow the free tutorial below! I designed it as a beginner tutorial, so even if you’ve just started crocheting, you can still make this snake.
I go over all the skills and stitches in this tutorial, so I highly recommend it if you need more clarification on any part of the pattern.
“Can I sell the plushies that I make with this pattern?”
Yes! Absolutely! What you do with the plushies you make is completely up to you! You may gift, donate, or sell any plushies that you make with any of my patterns. I would greatly appreciate if you could give "The Mary Jay" pattern credit and link back to this pattern when possible.
However, please do not sell, copy, or duplicate (to distribute) the crochet pattern itself in any form without permission.
Here’s the written pattern:
Skills and Abbreviations (In U.S. terms)
MR = Magic Ring (Magic Circle)
SC = Single Crochet
SL ST = Slip Stitch
HDC = Half Double Crochet
CH = Chain
INC = Increase
DEC = Decrease
FO = Fasten off
R= Round
Slip Knot
Turn
Recommended Materials:
(Based on what I used to make the snake in the sample photo.)
Super Bulky Weight Yarn (#6) in Green, Yellow, and Red OR the colors of your choice
Worsted Weight Yarn (#4) in Black (for the nostril detailing)
6 mm Crochet Hook (or a similar hook size)
Two 16 mm Safety Eyes
Stuffing
Yarn Needle
Scissors
Stitch Markers (Optional)
Pins (Optional)
“Where can I get the materials?”
You can find most of these items in a craft store, sometimes in places like Walmart, or on my Amazon Storefront. My Amazon Storefront contains my own personal favorites to use! It’s an affiliate link, which means I will earn a small commission at no extra cost to you if you use it to make a purchase. This is an additional way that helps support me and lets me continue to make free content for you.
I do also get a lot of my yarn from Joann! The colors that I used from Joann are lemon lime and buttercup (these are also affiliate links that help support me as well!) I bought the red that I used from Yarnspirations: Bernat Blanket Race Car Red.
“Can I use a different yarn or hook size?”
Yes! The above yarn sizes and hook size are recommendations based on what I used to make the plushie in the sample photo. Feel free to switch up the yarn or hook size based on what you have available or your preference.
If you are using a different yarn or hook size, don’t forget to make sure that the yarn and hook size work well together. For amigurumi, it’s often recommended to use a hook size that is 1-2mm smaller than the recommended hook size on the yarn label for tighter stitches and less holes in your project. However, different crocheters have their own preferences on hook size and you are welcome to follow your own preference.
Please note that the plushie may vary in size with different yarn and hook sizes.
“Can I replace the safety eyes with something else?”
Yes! Just like the yarn and hook size, the safety eyes listed are just what I used to make the plushie in the sample photo. Feel free to use a similar eye size or switch it up with felt, buttons, or even just embroider it with yarn.
Please note that safety eyes can be choking hazards and are not recommended for plushies made for young children or pets.
Base:
In this section, we’ll be making the head and the body.
Using Green
R1 8 SC in a MR
R2 [INC] x 8 (16)
R3 [SC, INC] x 8 ( 24)
R4-6 24 SC (24) 3 Rounds
R7 9 SC, 6 INC, 9 SC (30)
R8 30 SC (30)
R9 9 SC, 6 DEC, 9 SC (24)
R10 [DEC] x 12 (12)
Place the eyes between rounds 5 and 6 around 4 stitches apart.
Add stuffing to the head.
R11 [5 SC, INC] x 2 (14)
R12 [6 SC, INC] x 2 (16)
R13 [7 SC, INC] x 2 (18)
R14 [8 SC, INC] x 2 (20)
R15-17 20 SC (20) 3 Rounds
R18 [8 SC, DEC] x 2 (18)
Start stuffing and continue stuffing as you go.
R19 [SC, DEC] x 6 (12)
R20 [DEC] x 6 (6)
FO leaving a long tail for sewing. Finish stuffing
Use it to sew the plushie closed.
Tail:
Using Green
R1 4 SC in a MR
R2 [SC, INC] x 2 (6)
R3 [2 SC, INC] x 2 ( 8)
R4 [3 SC, INC] x 2 (10)
R5 [4 SC, INC] x 2 (12)
R6-12 5 SL ST, 7 HDC (12) 7 Rounds
FO leaving a long tail for sewing.
Add stuffing.
Tongue:
If you need more clarification with the tongue, please visit the video tutorial at timestamp: 41:02
The PDF version on Patreon also includes a step-by-step photo reference.
Using Red
CH 4
Turn and in the second chain from the hook, make a SL ST
CH 2
Turn and in the second chain from the hook, make a SL ST
Make 2 SL ST back down the chains that we made in Step 1
FO leaving a long tail for sewing.
Assembly and Details:
If you need more help with assembly or adding the details, please visit my tutorial at timestamp: 43:28
Tail:
Sew the tail onto R16 through R18 on the back of the body.
To hold the tail more closely to the body, continue sewing the the tail against the body along the curl of the tail until you reach R6 of the tail.

Tongue:
Sew the tongue between R8 and R9 on the front of the head.
Nostrils:
Using Black in #4 Worsted Weight Yarn, embroider the nostrils onto R7 of the head.
Belly:
Using Yellow and starting between rounds 11 and 12 of the body, embroider stripes to the belly of the snake until you reach the bottom of the body.
I made two lines of yellow yarn per row and moved one round down to make the next stripe.

Congratulations you finished your snake! Let me know what you decided to name your snake in the comments!
I love seeing the plushies you make! Follow and tag my socials!
Instagram, Tik Tok, YouTube: @themaryjay
Ready for your next project? Find more free patterns here !
You can also find more patterns in my shop or get them all at once by joining my Patreon!

Turn your snake into a strawberry snake with this free strawberry mod pattern!