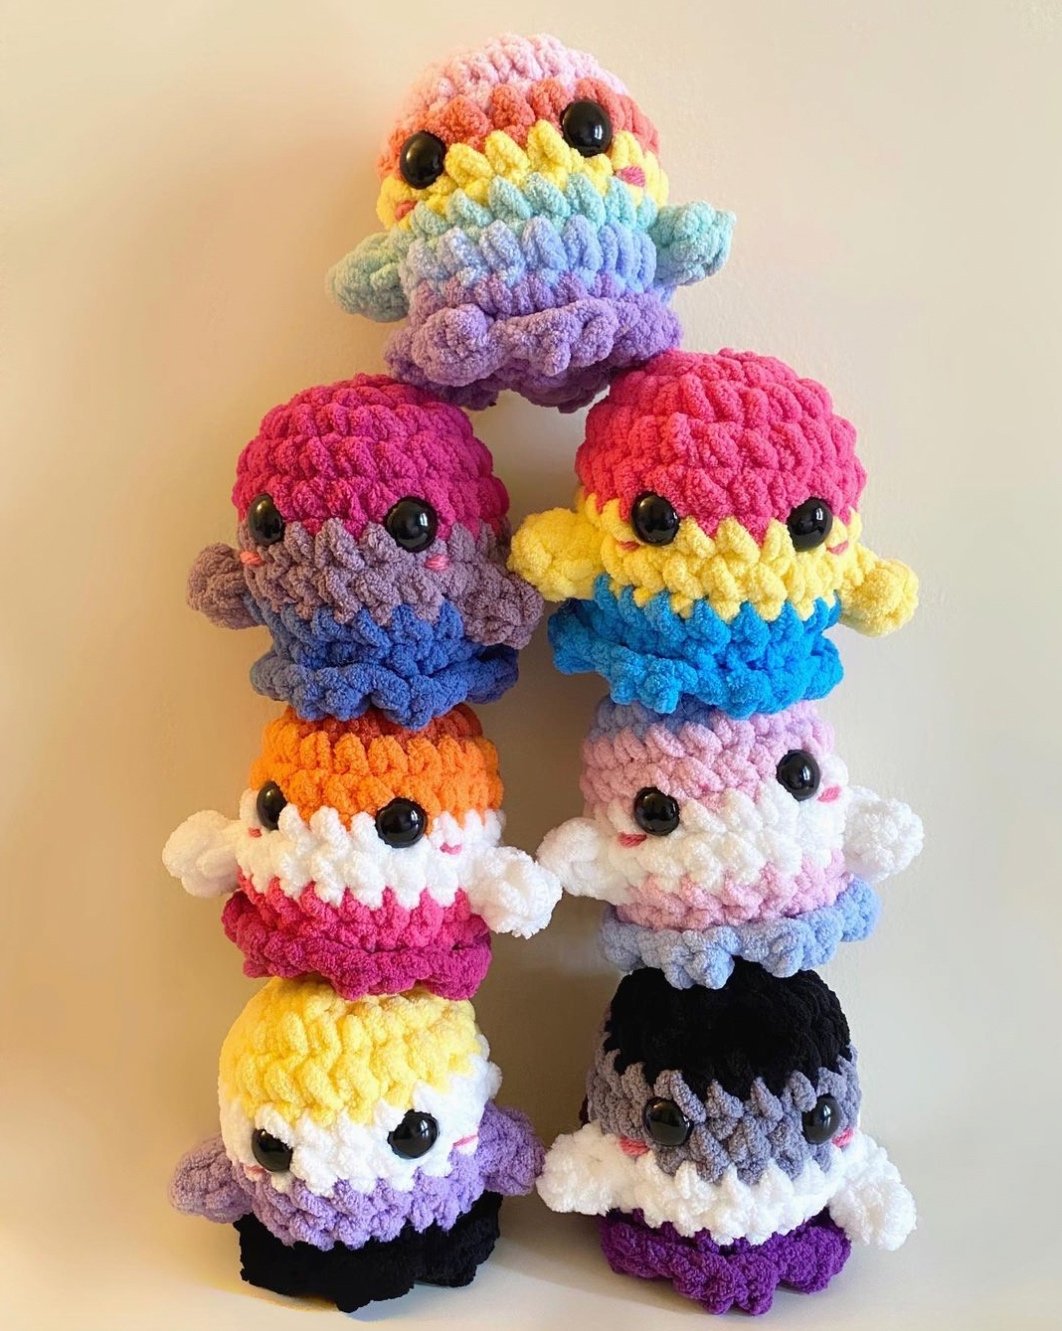
How to Crochet Pride Turtles
If you want to make a turtle based on the LGBTQ+ pride flags, here’s how to do that!

I love seeing the plushies that ya’ll make with my patterns! Follow and tag my socials!
Instagram, Tik Tok, YouTube: @themaryjay
To make a pride turtle, follow the same crochet steps as the original turtle pattern with the exception of changing colors at certain rounds of the shell. This occurs between round 1 to round 10 of the body instructions of the turtle. The pride flag colors will replace the “brown” color of the original pattern.
The following guide will tell you where to change colors on the body for a 7-stripe, 6-stripe, 5-stripe, 4-stripe, and 3-stripe turtle.
Abbreviations & Additional Skills:
R = Round/Row
Change Color
7-Stripe Turtle
For lesbian (7-stripe flag version), gay (7-stripe flag version), demigirl, demiboy, agender, pangender pride turtles etc.

R1-3: in the first color
R4: in the second color
R5: in the third color
R6: in the fourth color
R7: in the fifth color
R8: in the sixth color
R9 -10: in the seventh color
(If you are following the video tutorial, this should only be the section of R10 that’s crocheted in front loop only. Before you start working in back loop only, change color into the belly color as stated in the original pattern.)
Follow all other crochet instructions as they are in the turtle pattern to complete your turtle.
6-Stripe Turtle
For rainbow turtles etc.

R1-4: in the first color
R5: in the second color
R6: in the third color
R7: in the fourth color
R8: in the fifth color
R9-10: in the sixth color
(If you are following the video tutorial, this should only be the section of R10 that’s crocheted in front loop only. Before you start working in back loop only, change color into the belly color as stated in the original pattern.)
Follow all other crochet instructions as they are in the turtle pattern to complete your turtle.
5-Stripe Turtle
For transgender, omnisexual, genderfluid, lesbian (5-stripe version), gay (5-stripe version) pride turtles etc.
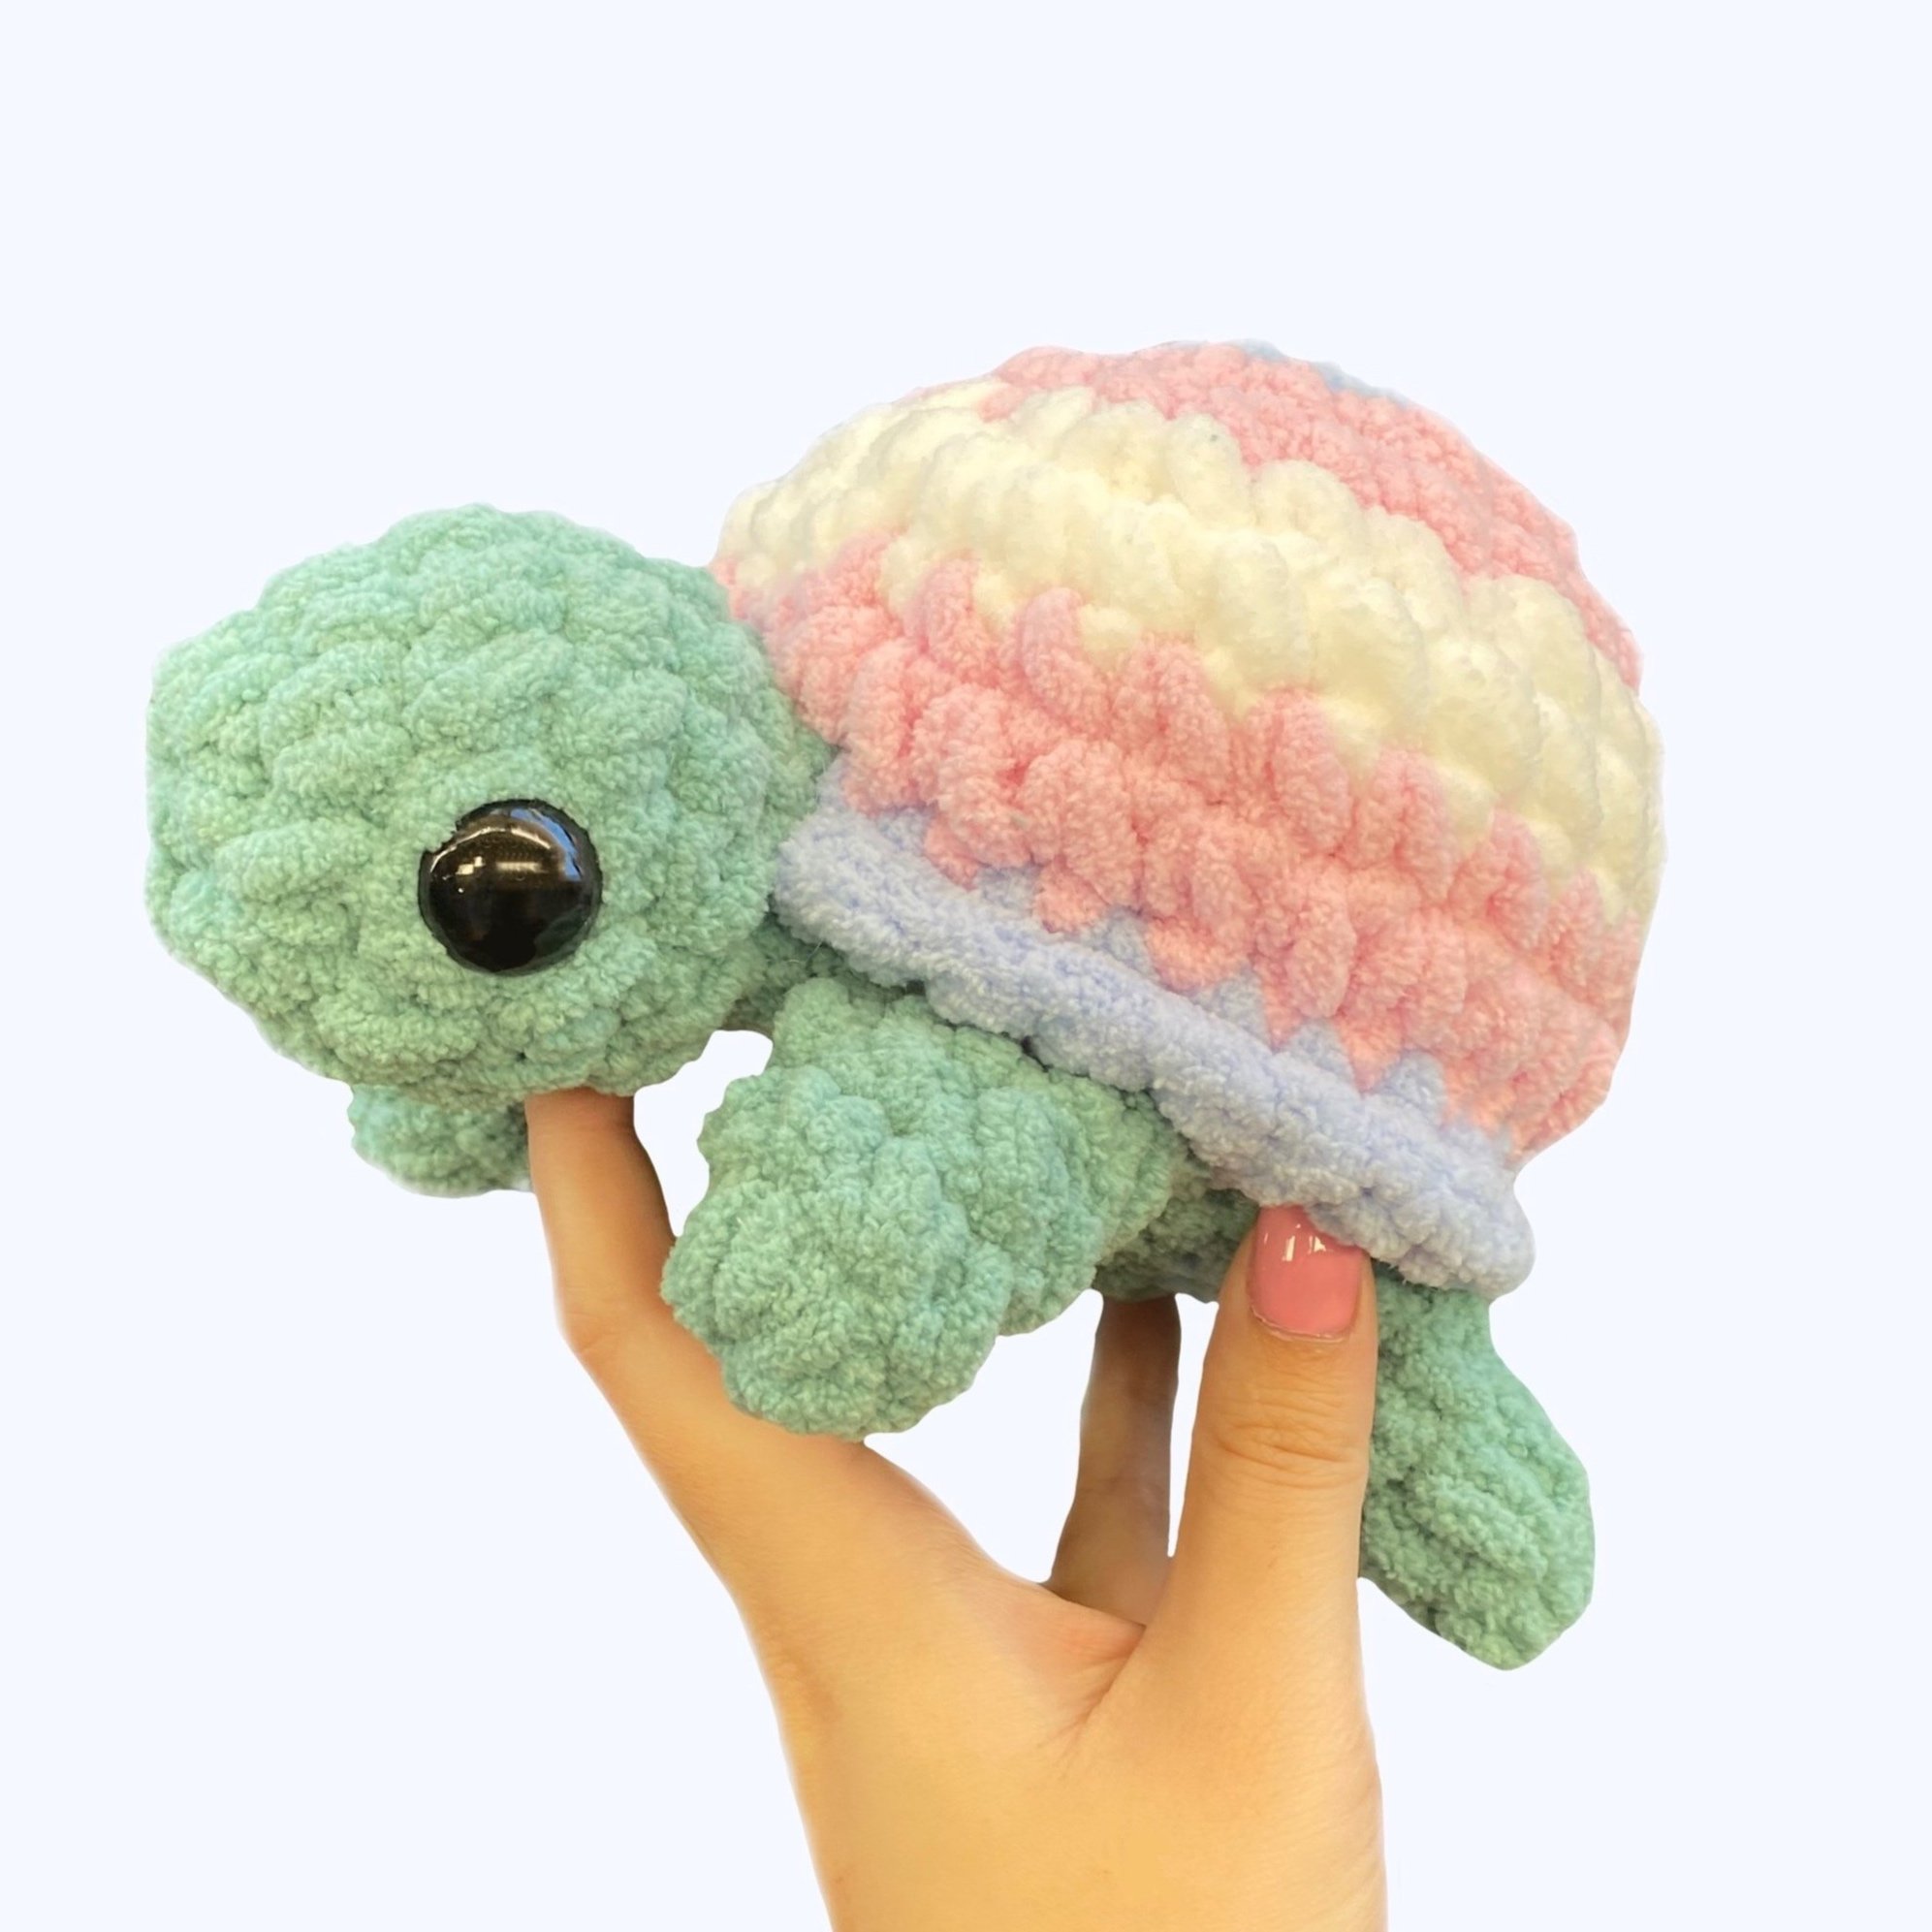
R1-2: in the first color
R3-4: in the second color
R5-6: in the third color
R7-8: in the fourth color
R9-10: in the fifth color
(If you are following the video tutorial, this should only be the section of R10 that’s crocheted in front loop only. Before you start working in back loop only, change color into the belly color as stated in the original pattern.)
Follow all other crochet instructions as they are in the turtle pattern to complete your turtle.
4-Stripe Turtle
For non-binary, asexual pride turtles etc.

R1-3: in the first color
R4-5: in the second color
R6-7: in the third color
R8-10: in the fourth color
(If you are following the video tutorial, this should only be the section of R10 that’s crocheted in front loop only. Before you start working in back loop only, change color into the belly color as stated in the original pattern.)
Follow all other crochet instructions as they are in the turtle pattern to complete your turtle.
3-Stripe Turtle
For bisexual, pansexual, polysexual, genderqueer pride turtles etc.
If you'd like a thinner middle stripe color like the bisexual pride turtle pictured below, follow method 1. If you'd like a thicker middle stripe color like the pansexual pride turtle, follow method 2.
Method 1: (for a thinner middle stripe)

R1-5: in the first color
R6-7: in the second color
R8-10: in the third color
(If you are following the video tutorial, this should only be the section of R10 that’s crocheted in front loop only. Before you start working in back loop only, change color into the belly color as stated in the original pattern.)
Follow all other crochet instructions as they are in the turtle pattern to complete your turtle.
Method 2: (for a thicker middle stripe)
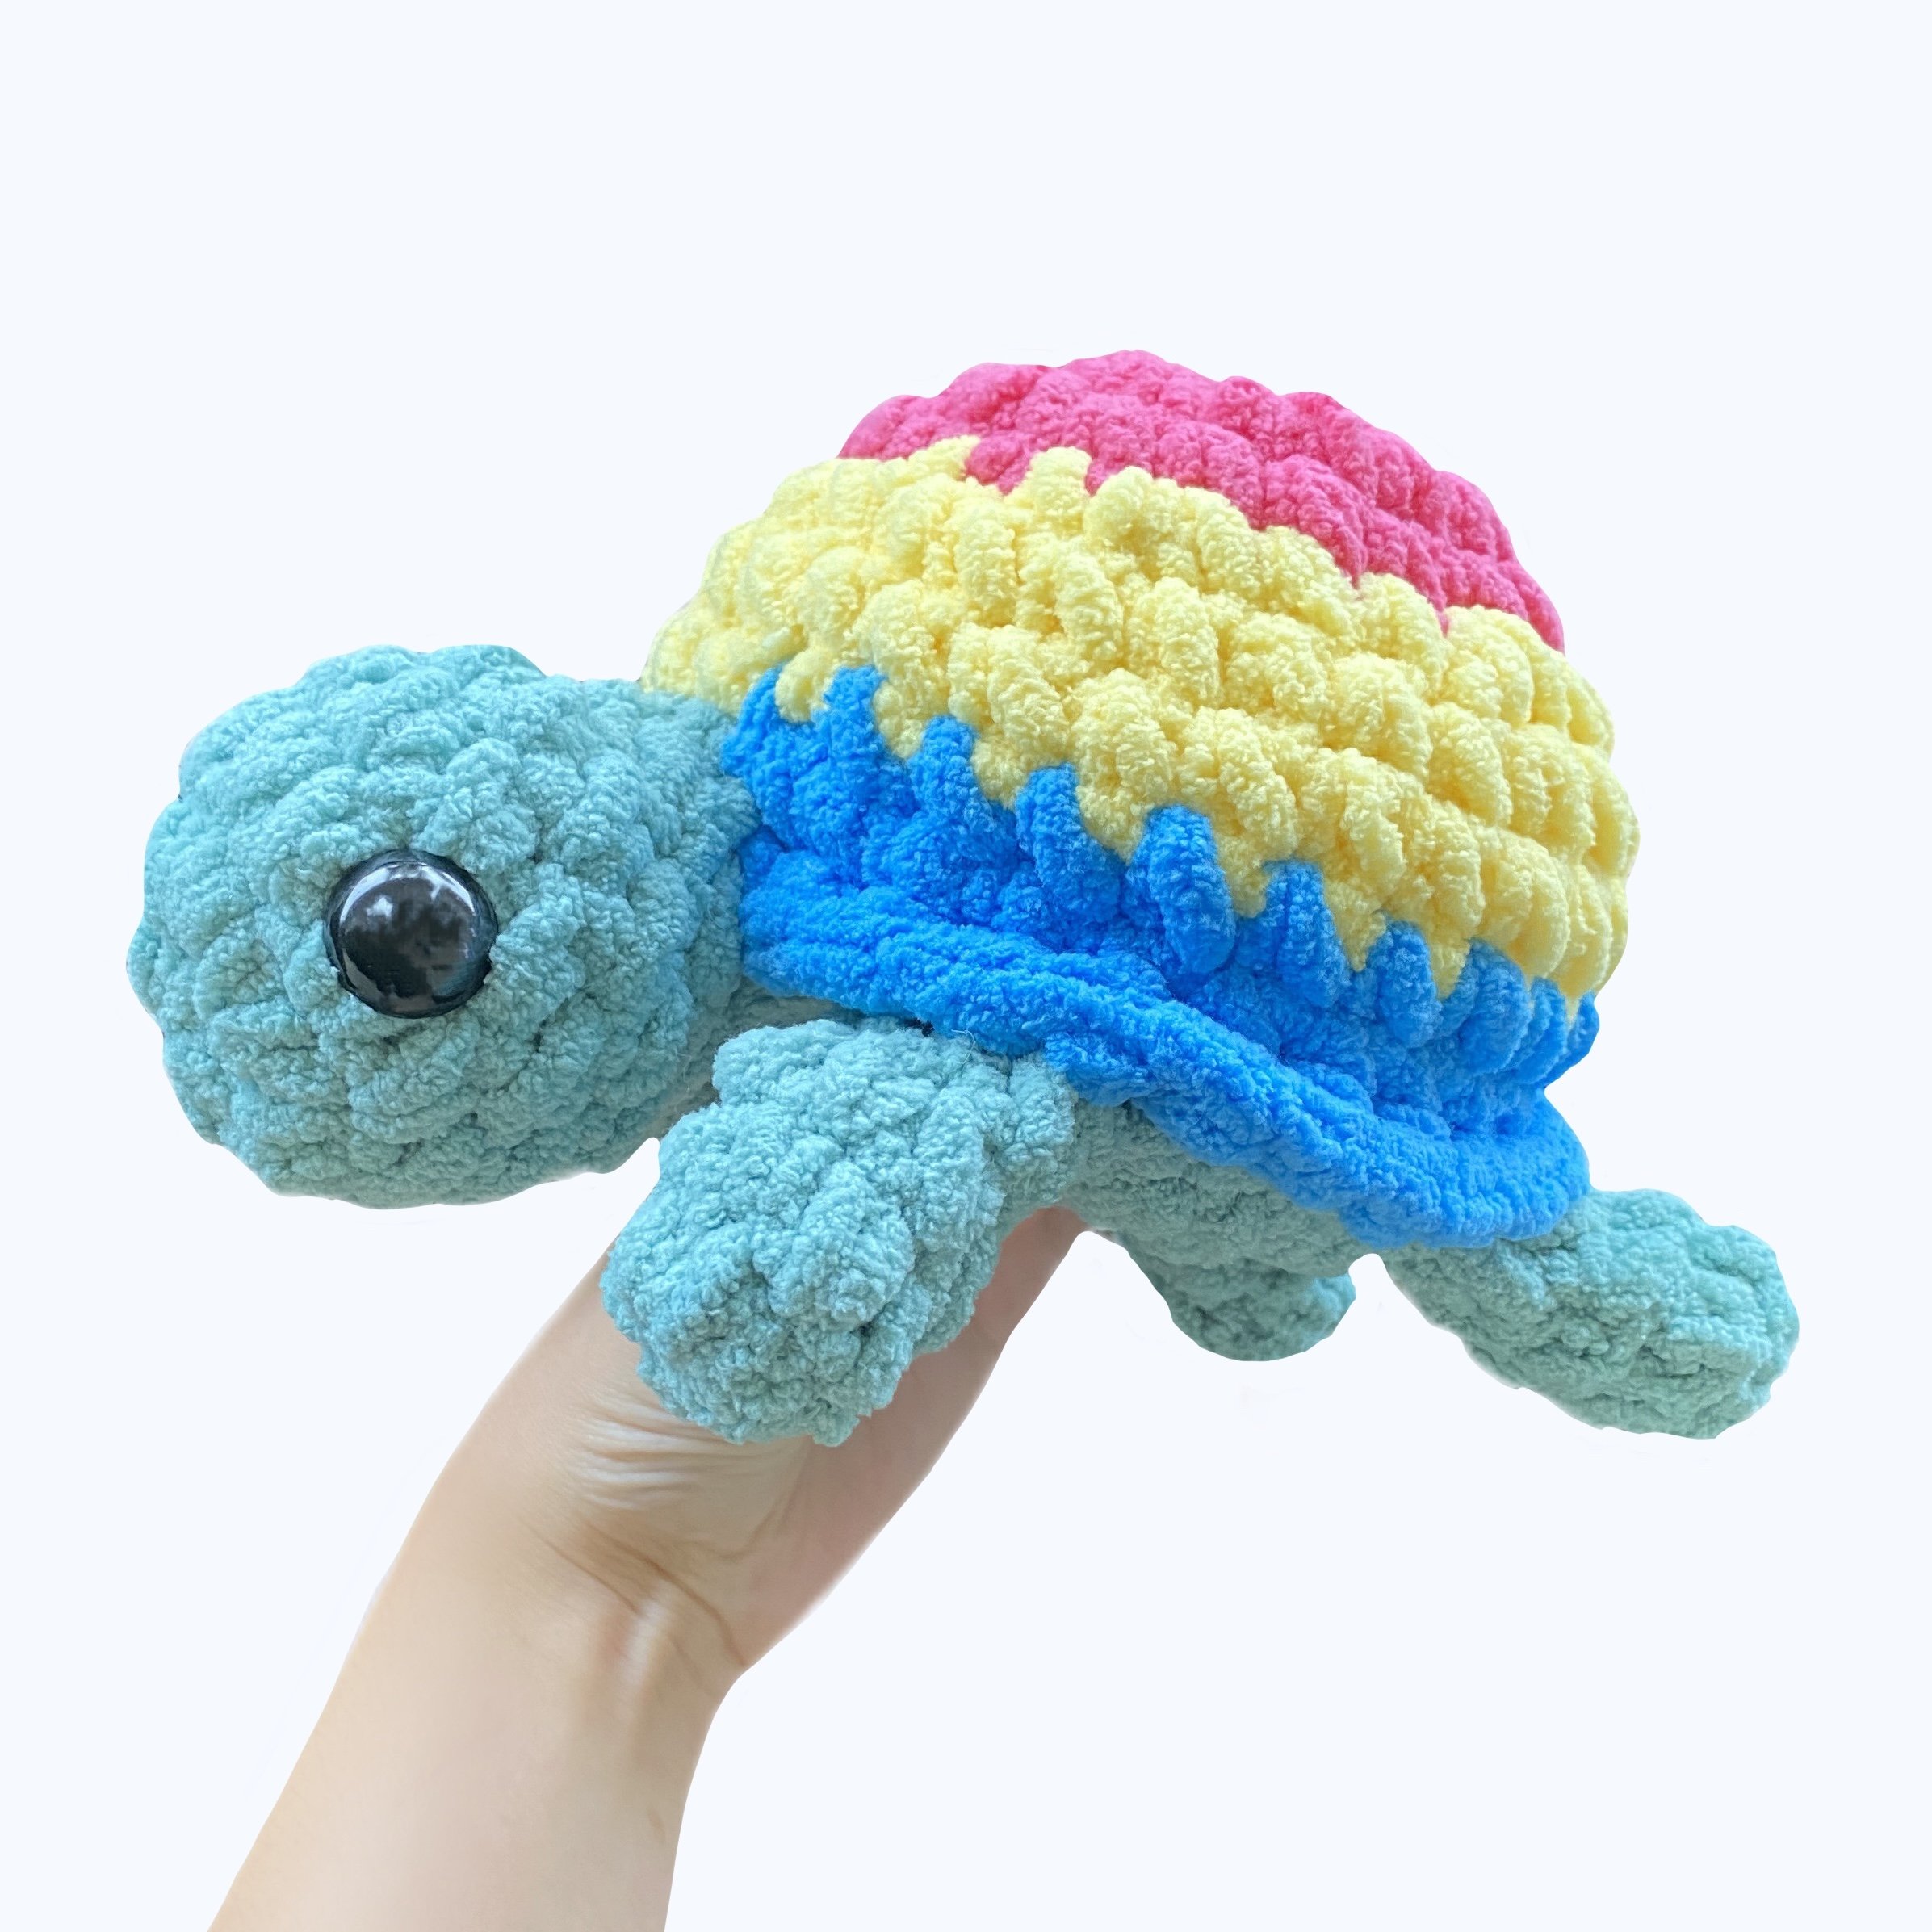
R1-4: in the first color
R5-7: in the second color
R8-10: in the third color
(If you are following the video tutorial, this should only be the section of R10 that’s crocheted in front loop only. Before you start working in back loop only, change color into the belly color as stated in the original pattern.)
Follow all other crochet instructions as they are in the turtle pattern to complete your turtle.
As always, you may sell, donate, or gift any turtles that you make given that you give “The Mary Jay” credit for the pattern. When possible, please also link back to the pattern if you are selling your plushies online.
However, please Do NOT duplicate to distribute or sell this crochet pattern/modification in any form without permission under any circumstance.
Thanks for following along!
If you want to make more pride plushies, check out my pride ghost mod guide based on my free ghost pattern!